- Home
- All Kinds of Palms
- DIY Palm Crafts
DIY Palm Tree craft
Multiple Crafty Options for All Ages
DIY palm tree craft projects can keep your kids entertained for awhile.
But they're one Type of Palm Tree activity any adults could enjoy, too. Especially when you make them with such care, you'll consider them Display Suitable! Like Learning to Draw a Palm Tree, that you'd be proud to hang on your wall, place on a table or desk, etc.
We'll show you different kinds of DIY palm tree craft projects that are fun. Some easy for kids, some more challenging and suitable for adults. But all that will give you, the crafty creator or child-helper, pride in the outcome of the work!
Look them all over, or Choose Those You'd Like to See Just Below:
FTC Disclosure: If you purchase via a link/ ad on this site, we may earn a small royalty. There's no added cost to you. Thanks much for any looks/ orders! Details>
Basic DIY Palm Tree Craft Supplies
Palm tree related crafts will nearly always use certain supplies over and over again.
Other Supplies will be used often enough. It will be good to keep certain supplies around.
DIY Crafting Room & Table
Can you arrange a specific area to keep your craft supplies?
- Maybe a Craft Storage Shelf or Table in a corner of an office or playroom.
- Perhaps there's a spare closet nearby that can be dedicated to storing craft supplies.
We use a corner of our home office to set up crafting materials.
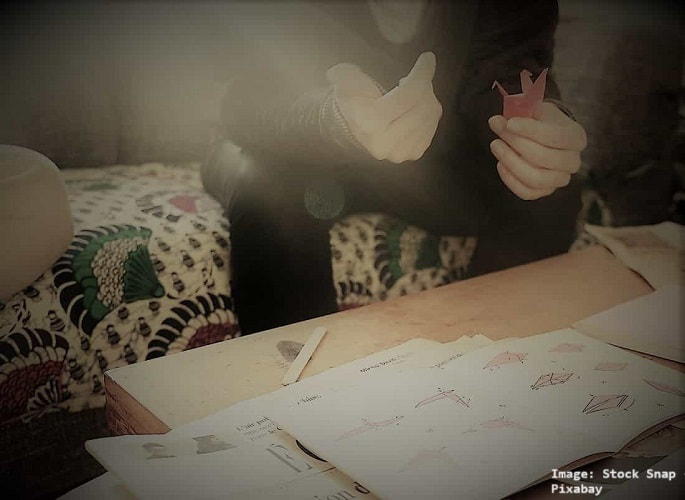 Using Print-Outs is Handy for Crafting
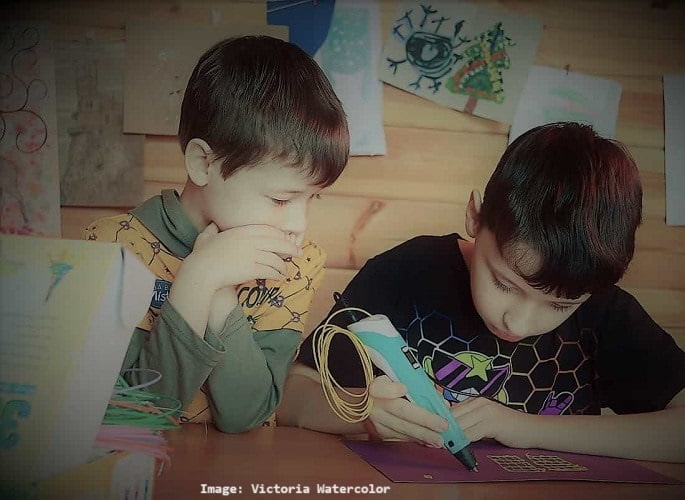 Kids Enjoy Developing Their Creative Side!
A Small Desk With Storage also could be useful for your supplies. The top surface can be a good workspace.
YOUR HANDY SUPPLIES
Keep-on-hand suggestions:
- Measuring: Tape-measure, Yardstick, & 12in/30.48cm Straight Edge Ruler.
- Small notebook (noting lists & ideas).
- Watercolor and/or Acrylic Paints & assorted brushes.
- Plaster of Paris can be handy.
- Scissors: several different sizes/types, Crafting Knife & Snips/Wire-Cutters.
- Assorted Containers: pails, jars, cups, lids, boxes, etc.
- Save useful odd shaped items for reuse: Egg Cartons, toilet tissue/paper towel cardboard cylinders, Berry Baskets, plastic drink bottles, butter/margarine tubs, etc.
- Old Travel Magazines or Catalogues as an image resource.
- Different types of paper. Examples: Graph Paper, White Copy Paper, Colored Construction Paper, Foil Paper, Assorted Wrapping Paper, Crepe Paper, & Tracing Paper.
- Old newspapers for covering workspaces. Any ad paper arriving via snail-mail!
- Assorted Colors of Thread, Yarn Colors, and/or Embroidery Thread.
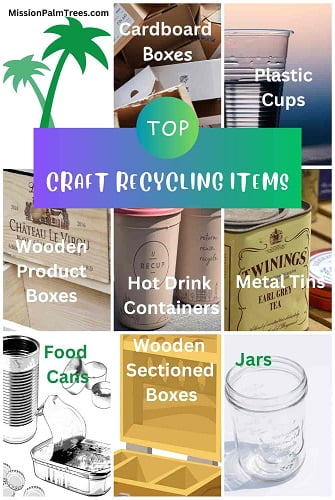 Keep these handy in your craft room.
DIY Palm Tree Craft Ideas
There are many DIY Palm Tree Craft ideas. Here are several...
Craft an Antique Palm Scene Artwork
Fabulous in a suitable Old-Timey Frame for hanging.
Supplies Needed
- Find a proportionately sized 9x12in picture or painting of a palm scene you like. Or try artificial intelligence for creating one (that's how we did ours you'll see below).
- Leftover very strong coffee/tea
- Large Baking Sheet Pan
- Four Paper-Weight items
- Transfer Pipettes>
- Spray bottle
 Finished DIY Palm Craft Project
Steps for Making Your Palm Artwork
Read these before beginning, so your plan is in mind.
Decide on artwork you'll use. Cover your working surface in old newspapers.
- If you're not printing it out on copy-paper, carefully remove the image you're using from its source. You may need Scissors, or (Recommended) Craft Knife to remove it.
- You'll want straight edges. Use the Ruler's Straight Edge for Cutting Straight/Even sides.
Be Careful With These Artwork Craft Steps
- Pour the dark coffee/tea liquid you're using into the sheet pan.
- Dip the artwork into the liquid. Be sure it gets fully coated. But not overly soggy so it falls apart!
- Carefully take the artwork out. Laying it flat onto the newspapers. Be sure it's flat.
- Then put Paperweights barely onto the corners.
Finishing Up Your Palm Art Project
- Suck up liquid with pipettes. Leaving a few small puddles in the artwork. Then gently make lines with a pipette filled with liquid across the art, simulating cracks. Helps it look authentic.
- Once dry, evaluate its look. Use the spray bottle to apply more "antiquing" liquid to it. Several times, if needed.
- When you're happy with the look, let it completely dry. Then be sure there's no wrinkling or curling by covering it for 24-48 hours with heavy books.
It should be all Ready For Framing!
Making a Palm Leaf Mat
As a kid, were you ever gifted one of those Pot-Holder Making Kits? I remember getting one when I was a kid. The same weaving method is used For Palm Fronds.
DIY Palm Tree Craft Quick Tutorial
Cool idea to use for summer outdoor get-togethers.
Don't have a Source for Your Own Leaves? Check with local gardening companies or try a Tropical Leaf Garland. They may save you some when they're Trimming Palms.
How to Make Palm Tree Accessories
There are multiple ideas for DIY Palm Tree Crafts. We've got several more...
Make a Bronze Palm Tree Sculpture
Turn a cheap plastic palm tree into your own artistic masterpiece!
Supplies:
- Cheap Plastic Palm Tree (check "dollar-type" stores & craft or party supply shops). It should have a flat bottom base.
- Large round hard plastic container lid for the base.
- Household Gel-Like Strong Glue & White Glue.
- Spray bottle with water.
- Spray Paints: Dark Brown, Silver & Gold Metallic.

Advance Planning Tip for choosing a fake palm: You'll be attaching the palm to the base made from the container lid.
Prep for this Fake Palm Sculpture Craft
- With strong household gel glue, attach the plastic palm's bottom onto the container lid.
- You want the plastic palm base to adhere well. It needs to be able to securely stay upright without problems.
- Be sure it's dry, then open the white glue. Smear it over the palm, giving it texture. Especially trunk areas & along the base. Thickly where the palm attaches to the base. When dry it should have a sculpted look.
Your Palm Sculpture's Finishing Touches
Give the glue plenty of time to dry. Then spray it all over with Dark Brown Spray Paint. Let that fully dry.
Have the water spray bottle & Silver-Metallic Spray Paint ready.
- First, spray all over with water.
- Then immediately spray it with the silver-metallic paint.
- Let all this fully dry.
Now find a place in your home decor for this bronzed palm artwork creation!
Craft a Palm Styled Desk Set
Create a swanky desk set that will impress others who visit your office, or come by your desk.

Supplies for a Palm-Themed Desk Set
- Blank copy/printer paper or white wrapping paper for drawing a template
- Gold Spray Paint
- White glue
- Pencil
- Ruler/straight-edge
- Scissors
- Palm Tree Stickers and/or Palm Charms for added tropical flavor.
More Needed Craft Prep Items
- The swanky style comes from Ultrasuede, get the color of your choice.
- A Length of Ribbon in a complementary color or design.
- Your own Drawing of a Palm Frond.
- Containers to make the set's basis. New from a dollar/craft store or recycle those from around the house. Adjust per your own needs/wants.
- For instance a soup-can could be the pencil/pen holder. A small box could be reused as a holder for supplies like paper clips, etc.
Steps for a Template for the Ultrasuede
Make templates for cutting your Ultrasuede.
Wrap paper around the container, cutting it down to near the size for easier working. Then get more specific & exact.
- Wrap the paper around the container, fitting it at the bottom. If there's already a full label on a can, for example, that can be the template. Remove it carefully.
- Mark the top in 3 places. Mark where it overlaps for the length.
- Take it off to draw lines with the straight edge, using the marks as your guide.
- Trim along the lines to finish the template.
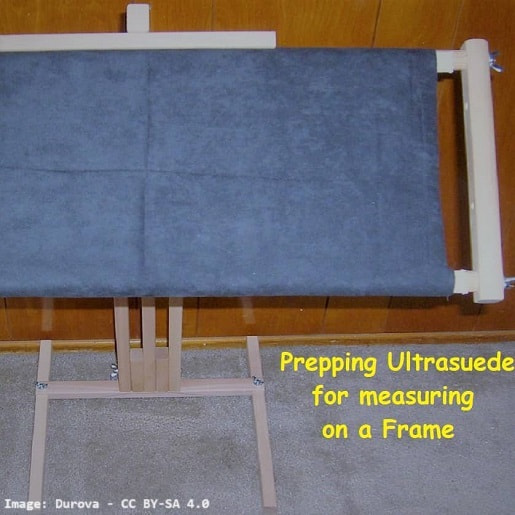
BEGIN YOUR DIY PALM CRAFT WORK
- Use gold paint to evenly spray your container's entire outside & inside. Let it dry.
- Put the template onto your Ultrasuede piece. Trace it & then cut.
- Smear white glue onto the rear of the Ultrasuede. Carefully place it on the sides of the container. Begin at the top edge to get it even, then smooth it downwards.
FINISHING TOUCHES
Decide on Palm Tree Charm/Sticker placements. Place the stickers, or Stick the charms in place. Use white glue for charms. Angling charms sometimes works best.
- Be sure the charm's surface isn't upright while drying, or it could slide. Lie it flat.
- Are you placing the Palm Charm on a cylinder? Before gluing gently bend the charm against the cylinder first, so it will fit.
Let it all dry. Now you can add ribbon to accessorize any pieces wherever you feel will look good.
Now you'll have a snazzy DIY Palm Tree craft desk set that really looks nice!
Crafts With Palm Leaves
On one of our trips to Maui, we purchased a Palm Leaf Basket from a native Hawaiian craftsman. He was set up just past Hana. It lasted for many years, but sadly got lost in one of our moves.
Varied uses of palm leaves can make many assorted crafts. A few Crafts With Palm Leaves are here for you to try.

Craft a Palm Leaf Light Switch Plate
Get your light switches in on the palm decor by adding palm frond styling to them.
Supplies:
- Spray Adhesive
- White Glue
- 1" Paint Brush
- Scissors & Craft Knife
- Clear Acrylic Spray Coating
- Small Phillips-Head Screwdriver
- Plus the needed artwork...
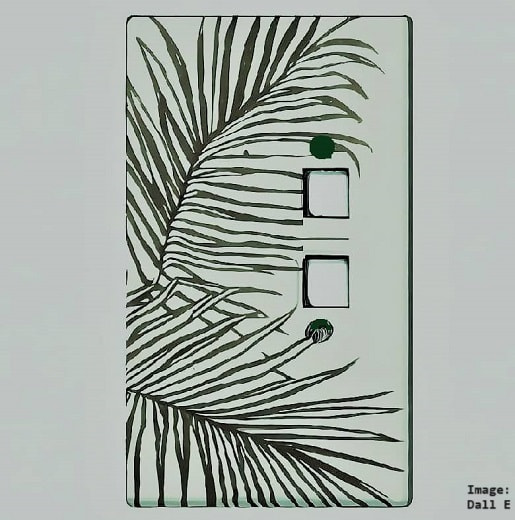 Create Your Own!
For Example -
- Cutouts of Palm Frond photos or Magazine Images, or Post Cards
- Or Internet Image Downloads for printing
- Or from Decorative Papers at Crafts Stores like Michaels or from Wrapping Paper.
- Consider Drawing Your Own Palm Fronds
Step by Step Crafting a Palm Tree Switchplate
Remember to begin by protecting your work space.
- Decide on your art & trace it to size by using the switch plate as a pattern.
- Remember, there's a rectangular middle area for the switch. Check for it interrupting the art. Consider that for your placement.
- At each of the picture corners, make a 3/8" cut inward toward the center.
- This enables the artwork corners to flatten over the arced switch plate corners.
Attaching Artwork to a Palm Switchplate
- Spray the palm frond art's backside with spray adhesive. Then carefully & evenly from the center outward, place the art over the switch plate. Smooth each of the sides downward to be sure they stick.
- Turn the plate over. Use your craft knife to cut an "X" into the back of the art, through the rectangular opening in the switch plate. That makes 4 triangles you'll fold to the plate back.
- Place a drop of white glue onto a triangle, smear it around. Fold it inward to stick onto the back of the switch plate. Do that with each triangle.
Finishing touches for Your Palm Switchplate
- Hold the plate up to the light looking at the front to find the screw holes, often above & below the switch rectangle. Use the craft knife to make an "X" into each, from the front. Push the screwdriver through the hole to push these triangles toward the back.
- Instead, a sharpened pencil can also be used to push through.
- Place the switch plate on your protected surface, right side up. Spray-coat it evenly with the Spray Acrylic Clear Coating. Wait at least 10 minutes for drying, then spray it again. Then do that process once more time.
Now it's ready for choosing the room you want to emphasize your Palm Tree Home Decor. And placing it there as a switch plate to light up your palmy energy! It will be a notable DIY Palm Tree craft your friends may imitate!
Palm Styled Writing Pen
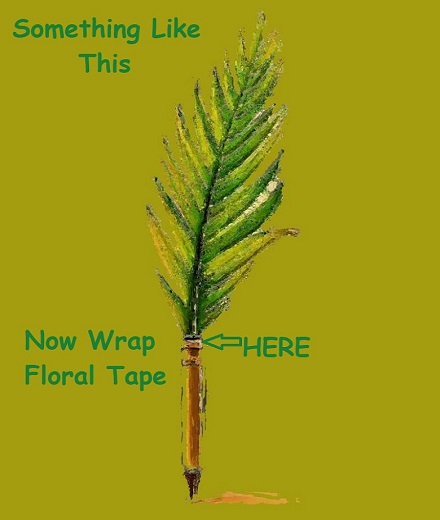
When writing, keep in tune with your palmy lifestyle by using your own pens with a palm leaf top!
Making a Palm Styled Writing Pen
Read the directions first. To help determine purchasing needs for this DIY palm tree craft.
Supplies:
- Ballpoint Pens (capped, non-click)
- Artificial Palm Fronds with thin/wire stems
- Floral Tape
- Wire cutters & scissors
- A ruler
First Check the Overview for This Craft
- How long do you want the stems from the palm fronds to the pen to be?
- You could make them variable if you're doing several pens.
- Don't make them too long, though - as writing with the pen could become unwieldy.
- With your above decision, now add 2in/51mm to the length of the palm stem you determined from the 1st step.
Continue This Craft by Making a Cut
MAKE THE CUT
- Trim the palm leaf's stem to the measurement you've figured. Use your wire cutters.
- If your palm fronds are small pinnates, what looks nice are 3 of them at different heights.
COMPLETION
- Secure the palm stem/s to the non-writing point end of the pen. Use a strip of the floral tape to anchor it.
- Begin winding more floral tape tightly around the palms wire stem/s, attaching it/them securely to the end of the pen.
The Palm Frond Pen is now all set for your next writing task!
 AI Image: Dall E
DIY Palm Tree Crafts for Holidays
Craft for Palm Sunday
Vintage Palm Sunday Artwork Craft
Many artists based artwork on Jesus returning to Jerusalem. Now commemorated on Palm Sunday. This artwork can be used as a DIY Palm Tree Craft for Palm Sunday. Suitable for youth Sunday school lessons at varied appropriate ages.
You can search the internet for related artwork for this plan. Or use one of ours provided.


Supplies for This Palm Sunday Craft
- Vintage Palm Sunday artwork print, like from a Picture Book Like This>
- Acrylic Paints
- White glue (try decoupage paste) & Spray Adhesive
- Small paintbrushes
ARTWORK BACKING
- Also a Flat Backing for the Artwork:
- Sized approximately 11inX14in/27.94X35.56cm. Smaller if need be. You'll want the backing larger than your print-out art.
- Use wood, metal, or plastic.
- Save on your budget. Look for cutting boards, used items, leftover wood cuttings from hardware/home stores, dollar store pieces, etc.
Steps for This Palm Sunday Craft
Read through them before gathering materials & beginning. So the instructions are in mind. Especially if you're helping Sunday School kids.
 Image From Silvan Illuminatoren Zeichnung
 Image: 501448 at Pixabay
- Attach your art print-out, centered, to your backing with the spray adhesive.
- Using gold acrylic paint, brush it over the edges of the art & onto the backing. The gold edges of each side can be a bit ragged.
- With a paper towel, smear red acrylic paint on the outer edges of the art's backing. Blend it into the gold. It should be a ragged blending where the two colors meet.
Artwork Finishing Touches
To Liven Up the Painting
- Use a color like those in the art to lightly spruce up any dark areas. A few little light brush strokes in the background, etc.
- If it's a line drawing, older youth can get creative with a few colors added to inside edges, like shading.
- Once all the paint is totally dry, get the white glue or decoupage paste. Cover the entire image & backing with this. This will style it with texturing, plus seal it all.
- When dry, it can be framed or hung as is, depending on the type of backing used.
Christmas Palm Tree
There are multiple ways to create a Christmas palm tree. Here are some ideas for your family members...
Hang Snowflakes on Your Palm
That's surely opposite sides of a coin! But what fun! Easy for kids to do.
Supplies:
- White Construction Paper (X how many snowflakes you'll make)
- Small dinner plate
- White yarn/thread
- Pointed scissors
- Clear Acrylic Spray Coating>
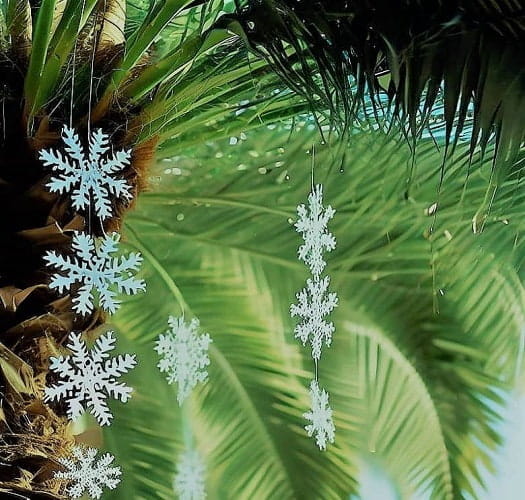 Image: MS Image Creator at Dall-E
Steps:
- Take a small plate for tracing a circle on white construction paper.
- Fold the circle in half, then 1/3 inward, & on the other side another third inward. Now fold that in half.
- On both sides, cut out chunks into the paper. Cut out little triangles or wedges, some small rectangles & half-circles.
SEE & USE YOUR DIY PALM TREE CRAFT!
- Open it up to see the whole snowflake.
- With the scissor point, poke a hole into one area, about one inch from the flake's edge. Cut lengths of white thread or yarn & put through for hanging.
- Using it outdoors? Spray the acrylic coating on both sides of the snowflake for weather protection.
Do you have an Indoor Potted Palm on which you can hang a few snowflakes?
Or a Palm Tree Type outdoors, with a rough trunk on which you can loop the yarn?
Takeaways for DIY Palm Tree Craft
We hope some of these craft projects worked well for you. That some were perfect as a DIY Palm Tree Craft for kids. And at least most were easy DIY palm tree crafts.


