- Home
- Palms as Symbols
- Kids' Palm Sunday Crafts
Palm Sunday Crafts for Kids
Five Fun Activities They'll Love
At Mission: Palm Trees
We help palm lovers simplify their searches and ease their concerns. Our articles are meant to inform, while having fun, easily Finding What You Want or Need. We eliminate unnecessary shoptalk & tiring research. We Discover For You!
Which Palm Sunday crafts for kids are delightful, yet simple? For engaging kids with traditional observations of Palm Sunday.
Maybe you're a parent, a Sunday School teacher, or a teacher in a religious school.
FTC Disclosure: If you purchase via a link/ ad on this site, we may earn a small royalty. There's no added cost to you. Thanks much for any looks/ orders! Details>
Designed to be easy, fun, educational & suitable for kids aged approximately 4 to 10 years old.
We suggest reading through the entire instruction first. To get an overall picture of the way the project should go. Here we'll guide you through Several Palm Crafts. Be sure to see the teaching connections for each Palm Sunday craft.
Palm Sunday Crafts Supplies & Tools
 Which of These Supplies Will be Useful for Palm Sunday Crafts for Kids?
Be sure you have what you need to help kids create their Palm Sunday craft projects. Many of our projects use the same supplies and tools. Have on hand these items:
TOOLS
- Scissors
- Ruler
- Glue or Paste (Child Friendly)
- Stapler
- Tape
SUPPLIES
- Especially the Color Green
- Disposable plates
- Paper, heavy cardboard, and/or Styrofoam
- These are made of sugar can & Already Tan In Color
- Thread, yarn or string
Some of these Palm Sunday crafts for kids will individually need other items. All needs are listed with each project.
Palm Frond Project
Here's a classic among Palm Sunday crafts for kids: a palm leaf project.
This is one of the most popular kids activities for Palm Sunday. It's simple, requires minimal materials, and is a great way to teach children about the significance of this holy day.
Needed Supplies
- Green Construction Paper
- A Pencil
- Pair of Scissors
- A Ruler
Steps for this Palm Sunday Craft
1) Place the green construction paper on the table/desk so the long end faces the child.
2) Draw an outline of a palm leaf on the construction paper. Make it as long as the paper. Going straight across or from the bottom corner to the top corner. Or you could see if one of these Palm Leaf Stencils may work for you.
- Begin at one end, to draw a slightly curved line to reach the paper's other end. Then make a similar line beginning where the first line started. But curve it out the opposite way.
- In this way, the palm leaf will have pointed ends.
- The leaf's middle should be wider than the pointed ends
3) Draw a line across the middle leaf's middle, to become the frond's central vein.
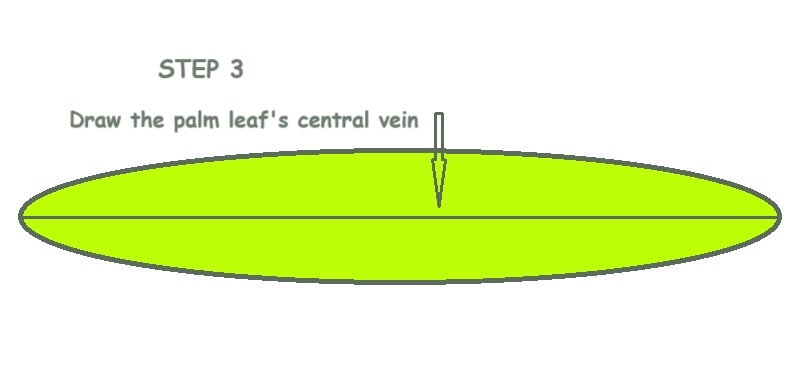 Begin the Inner Areas of the Palm Leaflet
4) Next, draw a few more lines on both sides of the middle vein. Make them lighter & parallel.
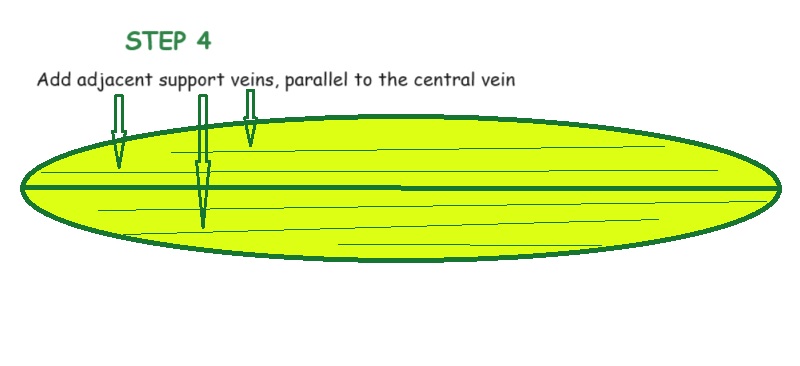
5) Now, cut along the outer curved lines, unleashing the frond!
6) Fold it lightly along the middle vein line. Then open it up again, so the leaf has a slight "V" shape.
Voila! It's a palm leaf! Each child can make a few, if desired. After they're done with this project, they can bring their Palm Frond home, decorating their rooms.
Teaching Points for this Palm Sunday Craft for Kids
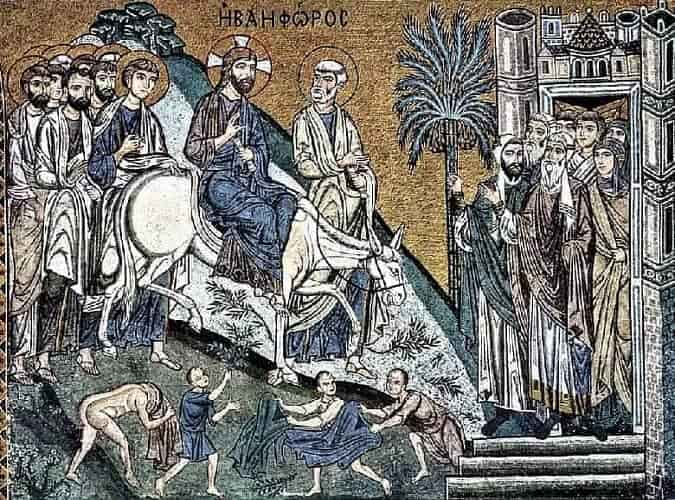
Kids can wave these during a Palm Sunday procession, imitating the people of Jerusalem. Who waved palm fronds, greeting Jesus as he entered town.
Tell them about the actual name for a palm leaf, which is a Palm Frond. Older kids can be shown how the type of frond used, is from a pinnate palm tree. That there's another type, called a palmate frond.
Palm Sunday Cross
Do you remember these crosses given out when you were little? Our catechism class sometimes handed them out for each kid.
Children will enjoy making this craft: a simple way to construct a Palm Sunday cross. This craft requires only a few items for its creation.
Needed Supplies
- Check with a palm-growing friend, or a local gardener or arborist for possible Trimmed Fronds)
- Alternatively, use strips of green construction paper. Similar to those created from the Palm Frond activity. Except make the curved edges with only a slight curve. Keeping them fairly narrow.
- For attaching areas, clear tape or a stapler.
- Large Crafting Marker.
Steps to Make a Palm Cross
1) Fold two palm leaves or paper strips in half, so the edges meet. Put a large marker into the end of the loop & press down, flipping it over to do the same. This makes a flatter loop, instead of a wide circular opening.
2) Then take tape to secure the edges together (or use the stapler).
3) Bring the secured edges of the two looped fronds/papers, and overlap them slightly. Place tape around them (or staple), to hold them together. Creating the crossbar for the cross.
4) Section out a small palm frond piece. Or make a narrow green paper strip. Wrap the frond section or green paper strip around the connection of the attached looped fronds. Covering the connection, making it look prettier.
5) Take another section of green construction paper, or of a natural leaf. The will be the upright section. It should be longer than the now completed crossbar. Fold it over three or four times, and secure it with the tape or stapler.
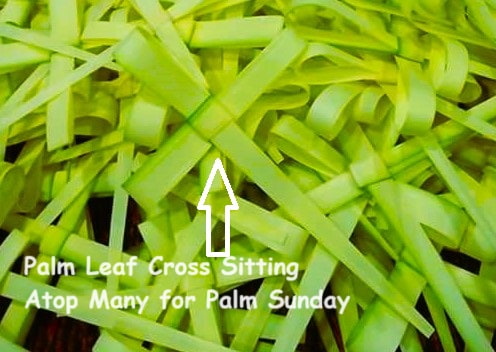 Image From: Halder97Sudipto - CC BY-SA 4.0
6) Take the crossbar & place it on top of the upright piece just created. Think of the way a cross looks for placement. Attach it to form a cross, using tape or a stapler.
7) For an optional final step, take a narrow strip of green construction paper. Wrap it around the area where the two sections connect. Use an "X" pattern. Secure it with tape at the rear of the cross. This makes for a finished appearance.
Just like that! Kids can bring it home for hanging up as a decoration.
One Other Idea
Another idea is using a different Palm Sunday craft for the kids. And Purchasing Palm Crosses to give out to your Sunday school group, or for your children.
Teaching Points About the Cross
This craft reminds people of the religious significance of Palm Sunday. The events of that day, which led up to the crucifixion. Connect the two, and the purpose Jesus had.
In an age appropriate manner, use the scripture from Romans 5:8. Which says "God demonstrates his own love for us in this: While we were still sinners, Christ died for us."
For young children, bring in this Children's Palm Sunday Book to read to them.
Palm Sunday Palm Tree Craft
Where do the palms come from? That are used for Palm Sunday. From a palm tree, of course! 😁 This Palm Sunday craft is excellent for the youngest kids. So easy for them to do.
What's Needed for This Project?
Very simple list of needed items!
- Your own hand
- Pencil
- Green construction paper
- Scissors
- Glue or paste
- Craft Popsicle Stick
- Or get a tongue depressor from a local medical supply store.
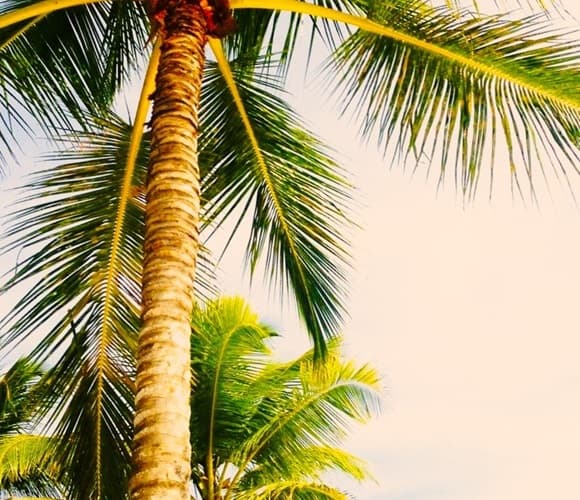
Another option is to use paints, markers or crayons to color the palm's popsicle stick trunk. The natural wood color is good, but fancy it up with darker brown crosswise stripes.
Many palm trees have them. Take a look at this example:
Teaching Points for Palm Trees
Date Palms (Phoenix dactylifera) have been useful to Middle Eastern cultures for centuries, that includes the Holy Lands.
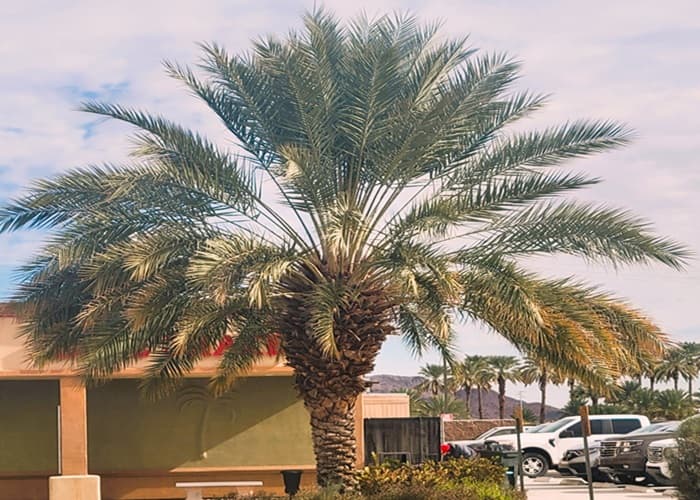
Citizens of Jerusalem used them for
- Date fruits for delish eating!
- The fronds for many purposes: thatch roofs, baskets & much more.
- Its wood for construction.
- Fruit/flower stems turned into brooms
- Seeds ground up for animal feed. Seed oil is used in skin treatments.
An idea is to Purchase Date Fruits to let kids sample one.
Donkey Craft for Palm Sunday
How about a Palm Sunday donkey craft? This can be lots of fun, especially for younger kids.
Materials Needed
- Paper Plate - Optional: Use these Made of Palms
- Brown Paint (kids' watercolors work well)
- Paint Brush
- Brown Construction Paper
- White Paper (like printer paper)
- Markers (multiple colors can add to the outcome)
1) First form the donkey's face. By painting the paper plate brown. Let it dry.
- Alternately, get these brownish Disposable Plates Made From Palms. Give them to the kids.
2) While drying, cut out two large ears from construction paper
3) Next cut two small eyes from the white paper.
4) Ensure the plate has dried.
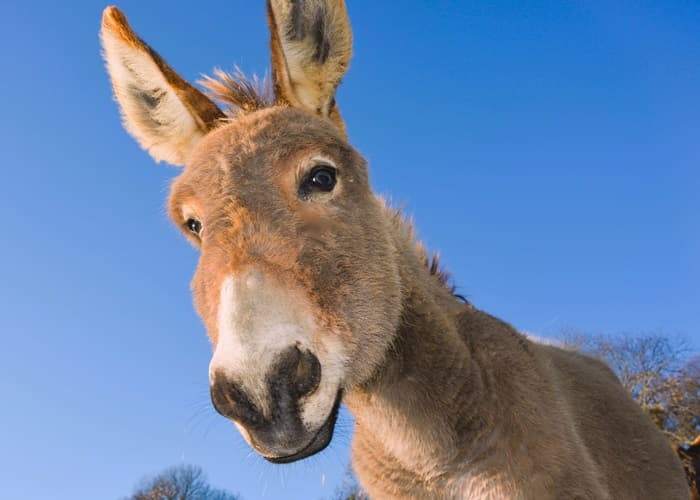 Here's a Donkey's Face as a Model Example
5) Glue the ears on top and the eyes in the middle.
6) Then, use a marker to draw the nostrils and mouth. Add a small iris within the eyes.
7) Optional: older kids could Add More Detail With Markers.
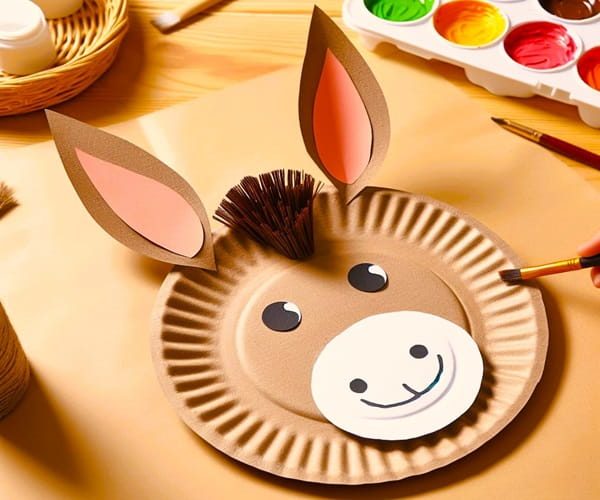 Here's an Example That One Child Made - Get Creative With It!
Background Teaching for the Donkey
This fun homemade Palm Sunday craft for kids is a fun way for teaching. Tell the story of Jesus' entrance into Jerusalem on a donkey. Or you can Read a Recommended Kids Book to them. Close by asking some thinking questions about it.
Palm Leaf Wreath
The Palm leaf wreath is a pretty, decorative Palm Sunday craft for kids.
Supplies Needed
- Several Palm Leaves. Best if one end is flat, the other pointy. If they're brown, soaking them in water greens them up.
- Alternatively, make palm fronds from green paper strips, as in the Palm Frond craft above. Except, one end can be straight instead of pointy.
- Paper Plate - Thicker type is best. Take a Look at This One>
- Glue - Or if using paper imitation fronds, Paste is okay.
- If you have it: A Compass (good usage later for school also!), or a Large Round Container (or its lid). Take a Look at This, useful later too!
- Plus a pencil for tracing.
1) Start by cutting out the paper plate's center. Leaving an outer ring.
- Some plates may have a ledge ring that can be followed.
- Otherwise, for even results use a compass to make an inner circle, or trace a circle.
2) On the straight end of a leaf, ooze glue onto approximately 1/4 up the leaf. Fasten each one in place. Overlap them, placing the pointy end in different directions.
3) Optional: intermittently glue in small dried flowers amongst the leaves.
It's now a beautiful palm leaf wreath! This Palm Sunday craft for kids is satisfying to make, as it can turn out really well. It makes a lovely decoration for Palm Sunday.
Teaching for Palm Wreath
Discuss the Symbolism of Palm Leaves. Talk about people waving palms at Jesus' entry into Jerusalem.
Collaborative Project to Make a Palm Sunday Banner
You can get kids working together to make a Palm Sunday banner.
- Large, Long Piece of Fabric or Banner Craft Paper. Any suitable size, but think of a typical banner.
- Alternatively Purchase a Blank Banner.
- Various Colored Markers, or a few colors of Craft Paint
- Length of string or yarn
- Craft glue
- Optional: Stick-on Letters, OR other Stick On Decorations OR try scattering Some Glittery Glue OR whatever decor kids might want to add.
1) Begin with showing the kids the main feature: wording to use. Maybe write it on a white/blackboard as the example to follow
2) Use stick-on letters, or instead, markers or paint to write the featured wording. Use a related Bible Quote, or one of these:
- Hosanna!
- Blessed is He who comes in the name of the Lord!
3) Now for added finesse, decorate around the words.
- Use Palm Leaves
- Stick-on Religious Symbols
- Any Palm Sunday Items you've found. These Crosses are Very Nice, with added items to them.
Additionally add scrolling, Twinkly Stars, clouds, Golden Pizzaz, etc. Kids could draw them instead.
4) Ensure the banner is dry. Then attach string to the corners for hanging up.
- If a material banner is used, cut small holes in the corner. Shore around the cut edges by adding paste. When dry, tie the string through the opening.
Discussion/Teaching for the Banner
This craft is a wonderful way to get kids involved in the Palm Sunday celebration. It adds a festive touch to your home or classroom.
To connect the banner further, as a Palm Sunday craft for kids, discuss what the quote and/or applied symbols mean.
- Like the word Hosannah!
- Originally coming from Hebrew: hoshi’a na. But with translations, for English it's become hosanna.
- In biblical times, it was a cry for help or saving from an action. But on Palm Sunday, it's used as a praise for the One Who Saves.
Takeaways for Palm Sunday Crafts for Kids
Each of these crafts is simple, traditional, and designed to be both fun and educational.
A great way to engage children in the celebration of Palm Sunday. Plus teach them about its significance. So, did you give any of these Palm Sunday crafts for kids a try?
